Introduction
Hello there, pruning enthusiasts! Are you tired of struggling with a blunt pruning saw? Worry not, as we have got you covered. In this article, we will guide you through the steps on how to sharpen your pruning saw. By taking care of your pruning saw, it can be passed down for generations as a well-maintained tool.
Why it’s important to sharpen your pruning saw
A sharpened pruning saw means precise and cleaner cuts. When you use a blunt saw, it results in damaged plants and can also cause physical strain. That’s why it is essential to have a sharpened pruning saw. Plus, a well-maintained pruning saw is an investment that will last for years to come.
The tools required
Before getting started, you will need some essential tools, including a sharpening rod or a 6-inch metal tapered file that slowly files away the soft metal and a saw set for repairing the teeth. Note that sharpening saw blades can be hazardous, so make sure to get acquainted with using the sharpening tools before the main sharpening procedure, and always put on protective gear while sharpening.
Now that you have learned the importance of sharpening your pruning saw and the necessary tools required let’s get ready to sharpen those blades and see the difference it makes in your garden work![1][2][3][4]

Disassemble the Pruning Saw
Are you ready to take your pruning saw to the next level? Start by disassembling the tool to make cleaning and sharpening easier! Here’s how to do it:
Taking apart the saw
If your pruning saw is easy to disassemble, start by taking it apart. Not sure how to start? Don’t worry! We’ve got you covered. Begin by taking pictures as you take the saw apart, so you can easily put it back together. Most pruning saws have a screw or a bolt and nut that holds the two halves of the tool together. Remove the nut or screw holding the two halves together and separate the two main pieces. Some pruning saws may have multiple screws, but you only need to concern yourself with the one in the center of the blade.
Removing the blade
Once you have disassembled the saw, it’s time to remove the blade. Some blades can be removed by simply unscrewing a single screw, while others may require more effort. If you’re unsure how to remove the blade, check out the manufacturer’s instructions. With a detachable blade, you can easily clean and sharpen it at your convenience.
Remember, disassembling your pruning saw may differ slightly depending on your tool’s style or manufacturer. Keep in mind that expensive top-end pruners often have parts designed to be replaced if they become too badly worn.
Now that you’ve disassembled your saw, it’s time to move onto cleaning and sharpening it. Stay tuned for our next article on how to clean and sharpen your pruning saw blades![5][6][7][8]

Clean Blade and Handle
Now that you have disassembled your pruning saw, let’s move on to cleaning and sharpening it. Here are the steps to clean the blade and handle of your saw:
Removing sap and dirt
First, remove any sap or dirt from the blade and handle of your saw. You can use a cloth or a brush to do so. It’s essential to remove the sap as it can damage the blade over time. This step will also ensure that your saw stays clean for longer.
Rust removal
If you notice rust on the blade or handle, don’t worry, it’s common! To remove rust, apply WD-40 and let it soak for around ten minutes. Once done, wipe off the oil with a clean cloth. Use coarse steel wool to work off any rust that remains. Keep in mind that if your pruning saw is extremely rusty, it may require a longer soak time.
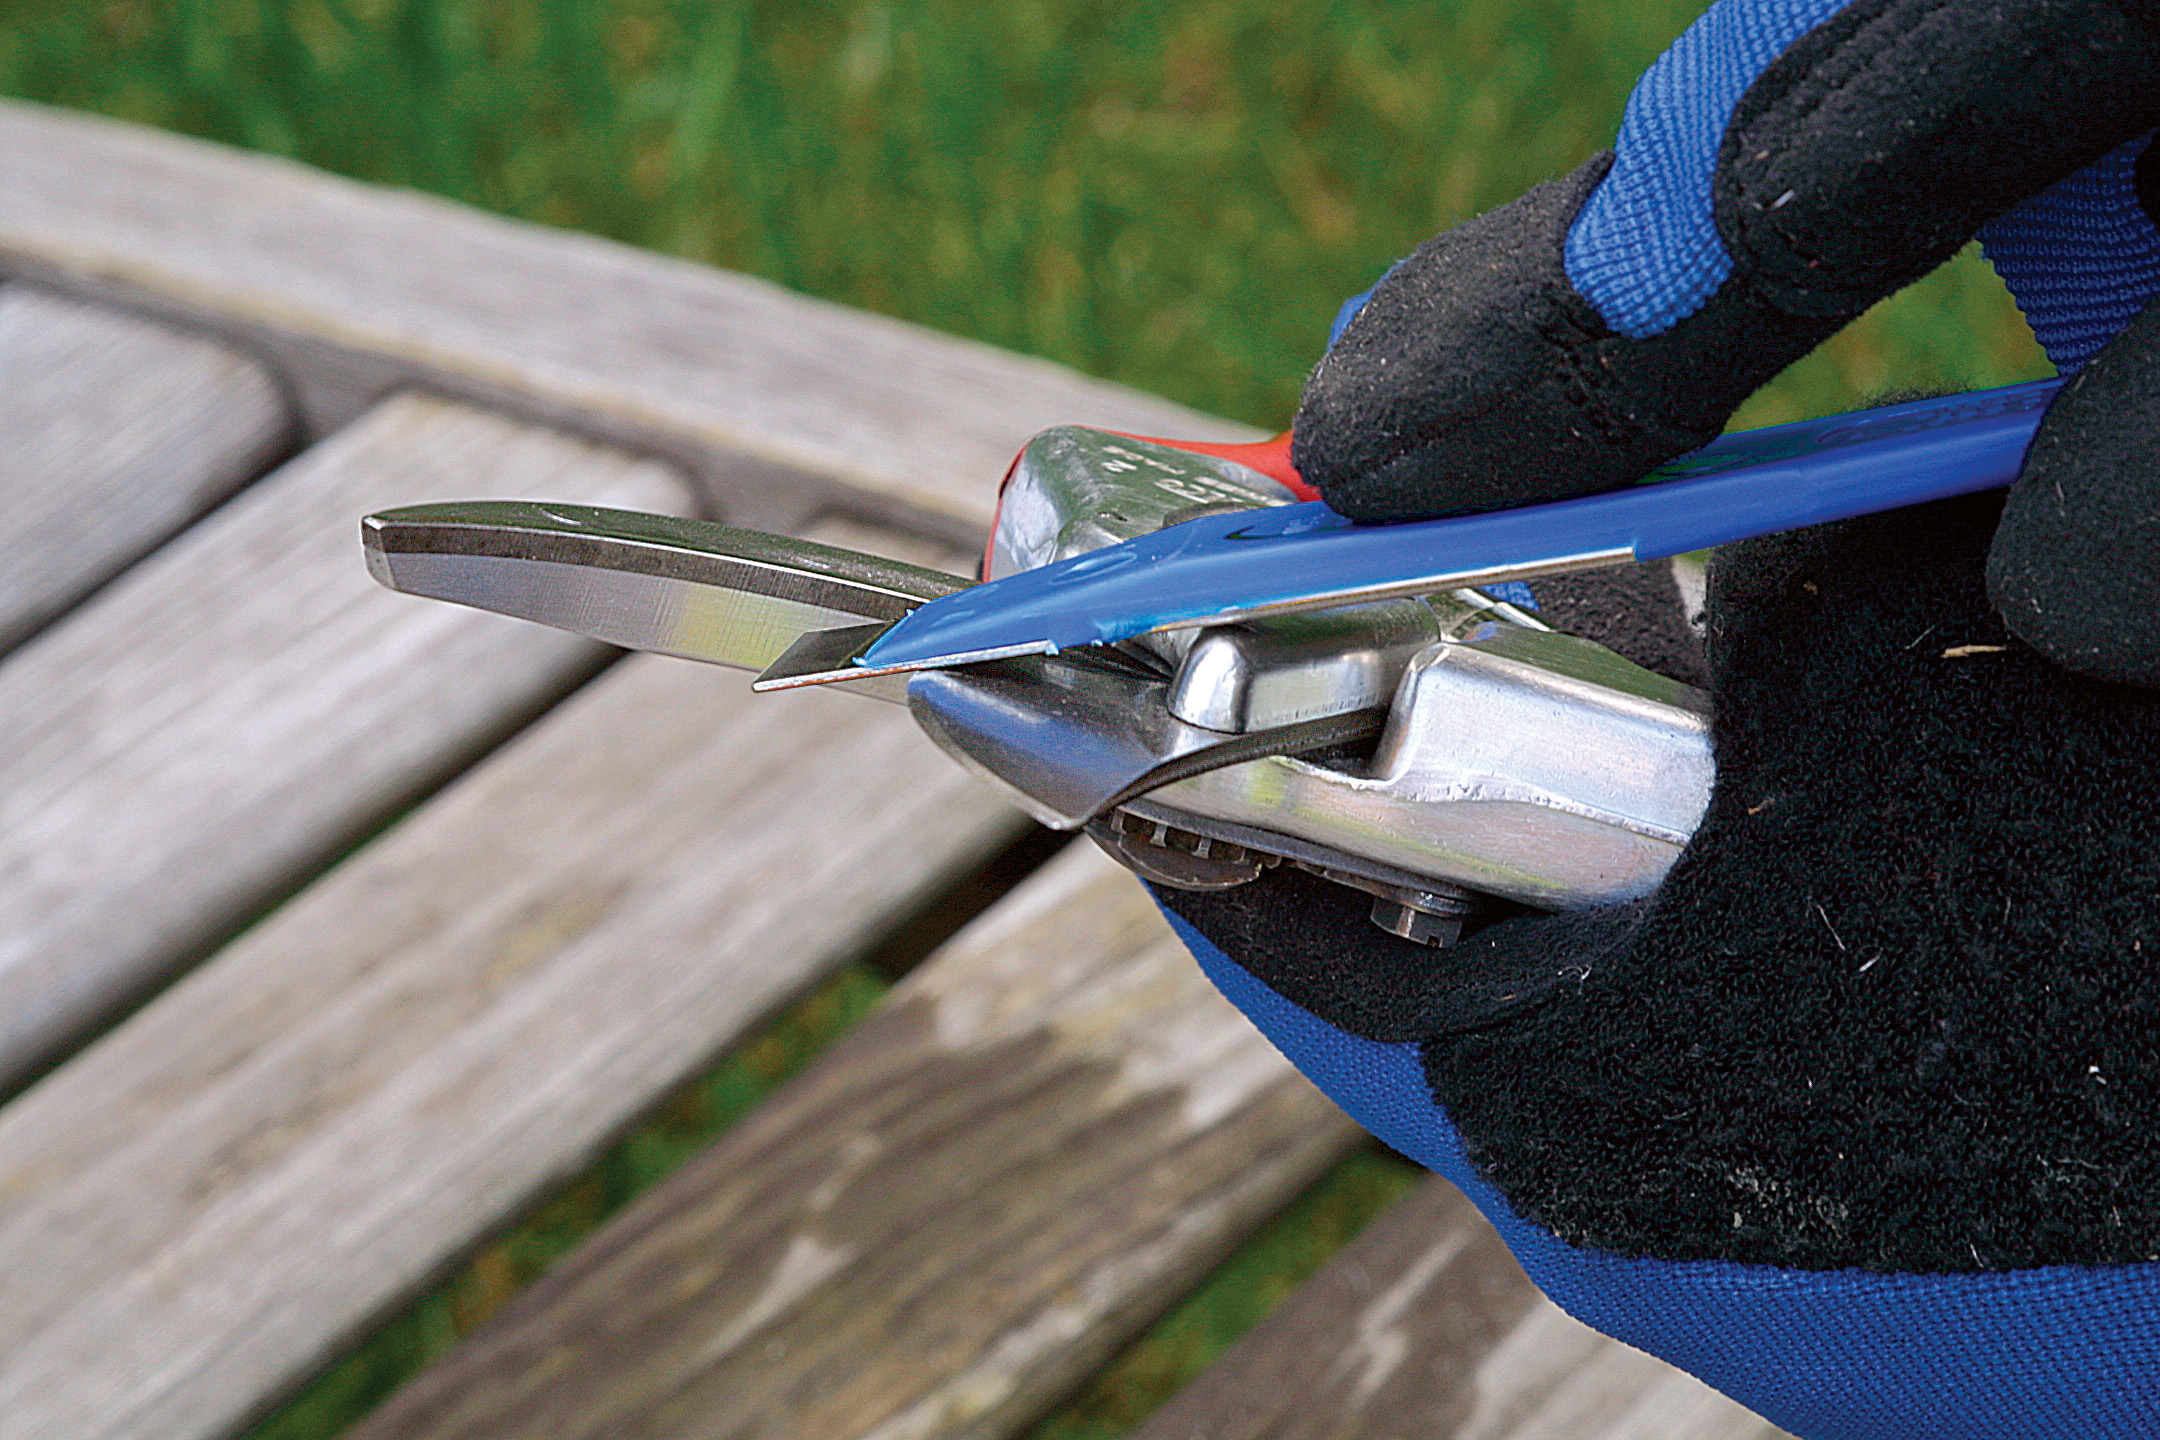
After cleaning your saw’s blade and handle, it’s time to sharpen its blade. Use a diamond file to sharpen the blade gently. Remember not to over-sharpen the blade as it can damage it. Sharpen both sides of the blade equally.
Once done, assemble your pruning saw and test it out! Your saw should now look and perform like a new one again.
Remember, keeping your pruning saw clean and sharp is crucial to prevent stress on your hands while cutting branches smoothly.[9][10][11][12]

Sharpening the Saw Blade
Now that you have cleaned the blade and handle of your pruning saw, it’s time to sharpen the saw blade. A sharp saw blade will make pruning easier and help prevent damage to your plants. Let’s go over the two methods of sharpening a pruning saw blade.
Using a carbide sharpening stone
A carbide sharpening stone is great for sharpening a saw blade quickly and easily. To use a carbide sharpening stone, follow these steps:
- Place the saw blade in a vise to hold it steady.
- Hold the carbide sharpening stone against the teeth of the blade at a 25-degree angle.
- Apply moderate pressure and move the stone back and forth across the blade.
- Repeat this process for each tooth on the blade.
After completing the above process, use a honing stone to remove any burrs from the teeth.
Using a diamond sharpening stone
A diamond sharpening stone is recommended for saw blades that require significant sharpening. To use a diamond sharpening stone, follow these steps:
- Place the saw blade in a vise to hold it steady.
- Use a coarse diamond sharpening stone to remove any nicks or damage to the teeth of the blade.
- Finish with a finer diamond sharpening stone to polish the edge of the blade.
- Repeat this process for each tooth on the blade.
Remember not to over-sharpen the blade, as it can be detrimental to its performance. A well-sharpened pruning saw will make pruning, trimming, and gardening tasks much more comfortable and efficient![13][14][15][16]

Sharpening the Gullets
In addition to sharpening the saw blade itself, it’s essential to also maintain and sharpen the gullets. Gullets form when square ground chisel cutter teeth are sharpened, and they can affect the ability of your saw to make clean cuts. Luckily, it’s easy to maintain the gullets on your saw chain with a few simple steps.
The use of triangular files
When filing the gullets, it’s essential to use a triangular file that is large enough to ensure all three sides wear evenly. If you’re unsure of what size file to use, go with a saw file, also known as a triangular or three-square file, that has single-cut teeth across each facet.
Maintaining the gullets
Most professional saw operators remove the gullets every three to five sharpenings. However, this depends on how much of the cutter tooth is ground off during each sharpening. If the gullet grows beyond 1/8 inch, it needs to be removed because it can hinder the saw’s ability to cut correctly, no matter how sharp the tooth is.
Sharpening the gullets won’t take up much of your time. Maintaining them will ensure that your saw chain operates at its best and will help you prolong the life of your saw blade. Happy pruning![17][18][19][20]

Reassembling the Pruning Saw
After sharpening the pruning saw, it’s time to put it back together. Here’s how to do it:
Putting the blade back in its place
Position the blade into the handle with the serrated edge facing forward. Use your fingers to make sure that the blade is properly seated in its place.
Tightening the nuts and bolts
Once you’re sure that the blade is in its correct position, tighten the nuts and bolts to hold it in place. Don’t overtighten the hardware as it can damage the threading or strip it entirely.
If the handle still has any old varnish or rough edges, lightly sand it off before applying linseed oil using an oily rag. Remember to maintain the gullets by using a triangular file that is large enough to ensure all three sides wear evenly, so your saw operates at its best.
With proper maintenance and sharpening, your pruning saw can last for years and provide you with clean cuts every time you use it. Happy pruning![21][22][23][24]
Reassembling the Pruning Saw
After sharpening your pruning saw, it’s time to put it back together so that you can make the most of its cutting capabilities. Follow these simple steps to reassemble your pruning saw:
Putting the blade back in its place
First and foremost, position the blade into the handle with the serrated edge facing forward. Use your fingers to make sure that the blade is properly seated in its place.
Tightening the nuts and bolts
Once you’re sure that the blade is in its correct position, tighten the nuts and bolts to hold it in place. Remember not to overtighten the hardware, as doing so can damage the threading or strip it entirely.
If the handle still has any old varnish or rough edges, lightly sand it off before applying linseed oil using an oily rag. Furthermore, maintain the gullets by using a triangular file that is large enough to ensure all three sides wear evenly, so your saw operates at its best.
Finally, you’re all set to test your pruning saw’s performance!
Testing the Saw
Checking the sharpness of the blade
To check the sharpness of your newly sharpened blade, run a gloved finger gently over its surface. When its teeth feel sharp to your fingertip, you can move on to testing.
Making a test cut
Reinstall the blade on the saw and plug it firmly into a power source, then perform a test cut on a scrap piece of wood. This will help you verify if your saw is performing efficiently or not. If your saw isn’t cutting through wood as swiftly as you’d like or seems to bind up, repeat the filing process. However, if the blade is severely damaged or worn out, it may be time to consider purchasing a replacement.
With proper maintenance and sharpening techniques, your pruning saw can last for many years and provide you with clean cuts whenever you use it. Happy pruning![25][26][27][28]

Maintenance Tips
After sharpening your pruning saw, it’s important to keep it in top form to ensure it lasts for many years. Here are some maintenance tips to follow:
Keeping your pruning saw clean
Clean your saw after each use with a damp cloth to remove any dirt or debris that may cause rust or damage to the blade. Avoid using abrasive materials to clean your saw as this can damage the blade’s teeth.
Lubricating the blade and handle
Keep your saw blade lubricated with gun oil paste wax or WD-40 after each use to prevent rust and keep it working efficiently. You can also oil the handle to prevent wood from splitting or cracking.
Storing the saw safely
Store your pruning saw in a dry place or toolbox to prevent rust. Do not leave it exposed to the elements or in an area prone to moisture. Keep the blade covered with a sheath or blade guard.
By following these simple maintenance tips, you can keep your pruning saw in optimal condition and enjoy clean and effortless cuts every time you use it![30][31][32]


